How to make a laptop childproof
Welcome back from the Festive season, it’s a new year, just to start with.
2017 had it’s ‘tech ups and downs’ and so will 2018. Most importantly, there has been a significant development in the use of the internet, computers and technology in general. Good to say, but we should not just forget about how last year’s trend also negatively affected the country.
Keep Reading
The fact that many school-going kids are spending many hours in front of computers every day, challenges from parents regarding the negative impact also increased. Today, almost every modern family around Uganda has tech-tools that are usually used beyond just the parents. In so doing, kids have been embroiled in the good and bad of it all.
The Internet is filled with websites that are inappropriate for anyone, much less children. Sometimes kids get into trouble using phones or laptops from their parents all the time, sometimes out of curiosity, even when they are just looking for a little entertainment.
One of the interesting observations relating to this was from a senior sports scribe, Patrick Kanyomozi, who sarcastically posted on Facebook to express how he had failed to cage his kid from using his laptop.

Kids might be whizzes with modern technology but their adventurous spirits can sometimes lead to all sorts of bother just like that above. Give a child unrestricted access to your laptop, for example, and pretty soon Windows will be replaced by a Minecraft server.
Even if your offspring aren’t the mischievous types, curiosity and a little bit of innocent web surfing can all too easily result in them stumbling upon unpleasant materials.

However, even when we sometimes can’t ‘child-proof’ our laptops, or make the Internet itself kid-safe, there’s has always been a way we can make tech-tools safer for our kids in 2018.
Scott Colvey a Tech-writer for home.bt.com shared a few steps towards getting your child off ‘your things’.
Step 1: Understand user accounts
Scott Colvey says; “You might already know that user accounts can be set up to provide different laptop users with their own space”. To store documents and personalize the way they use the computer. User accounts also offer a handy way to prevent unwanted software installations and changes to the way things work – to this, you must understand the different types and know how to set them up.
There are administrator and standard accounts in Windows and Mac OS X; a user logged in with an administrator account can do anything they want to the computer; but standard users are limited in what they can do, dictated by those with administrator accounts.
Step 2: Set up user accounts – Windows 7
Clearly, it makes sense to set up children with standard accounts. Macbook users should skip to Step 4, while Windows 8 users should jump to Step 3.
In Windows 7, click Start and type ‘user accounts’ and then click User Accounts. Now click ‘Manage another account’ followed by ‘Create a new account’.
Select ‘Standard user’ and type a name for the user and click the Create Account button. Skip to Step 5.
Step 3: Set up user accounts – Windows 8
Open the Charms bar (hold down the Windows key and tap C) then click Settings followed by ‘Change PC settings’. Now click ‘Other accounts’ followed by ‘Add a user’.
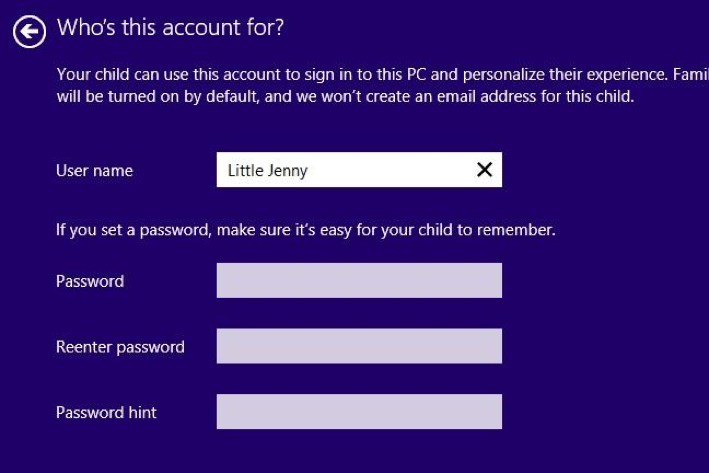
Click ‘Add a child’s account’ and then decide whether or not you wish to set up an account that has access to the Windows Store. For simplicity (and the most safety), choose ‘Add a child’s account without email’ – this sets up what’s known as a ‘local’ account.
Add a password to the account if you want and then click Next followed by Finish. Skip to Step 6.
Step 4: Set up user accounts – Mac OS X
Open the Apple menu and choose System Preferences followed by Accounts. Click the plus (‘+’) symbol, fill in the form and then click Create Account.
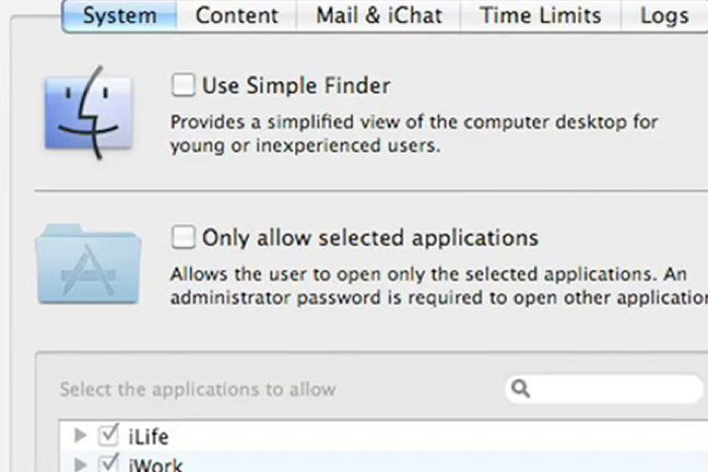
Tick the ‘Enable parental controls’ box and then click the Open Parental Controls button. Select the relevant user then use the options on the right to decide how the user can work with the laptop.
The key headings are System, Content, Mail & Chat and Time Limits. Click Content, for example, to limit what they can do on the web; or Time Limits to set the hours during which the laptop can be used.
Step 5: Set up Parental Controls – Windows 7
Windows 7’s Parental Controls feature allows you to manage certain aspects of how the computer is used, including choosing the hours it can be used and the programs that are available for use.
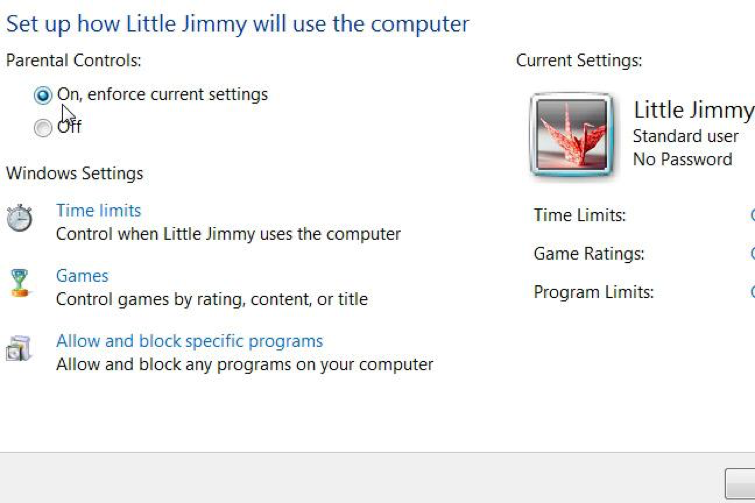
Click Start, type ‘parental controls’ and then click Parental Controls above. Click to select a user account and then choose ‘On, enforce current settings’.
Now use the options below to control how the select user can work with the laptop. Select Games, for example, to decide which game titles they can play based on the Pan European Game Information (PEGI) ratings that are usually printed on the packaging.
Step 6: Set up Family Safety – Windows
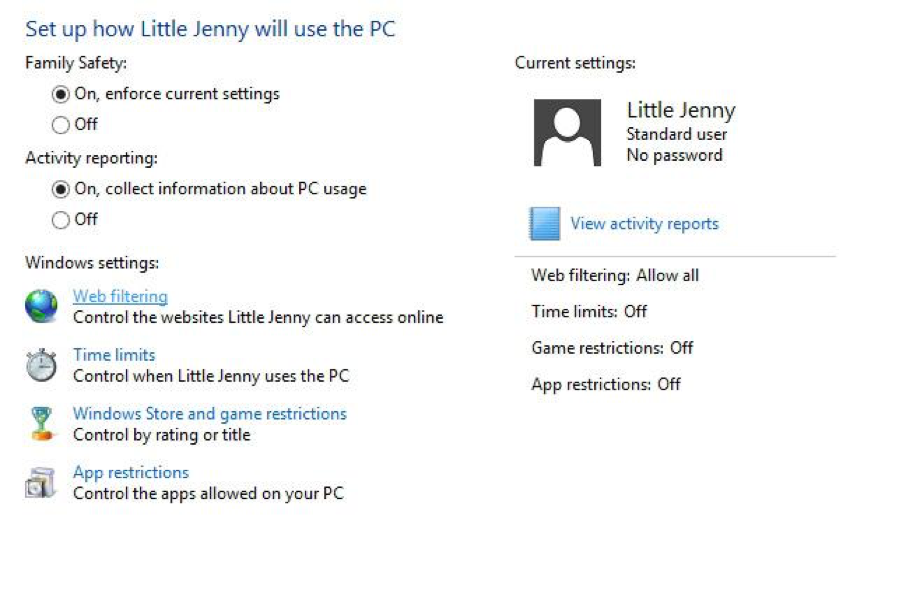
In Windows 8, parental controls are called Family Safety. From the Start screen, type ‘family safety’ then click Family Safety followed by the relevant user name.
Ensure that ‘On, enforce current settings’ is selected then use the options below to control how the select user can work with the laptop.
To restrict surfing to specific websites, for example, click ‘Web filtering’ followed by ‘[Username] can only use the websites I allow’.
To have Windows 8 control web content automatically, click ‘Set web filtering level’ followed by the desired level.